
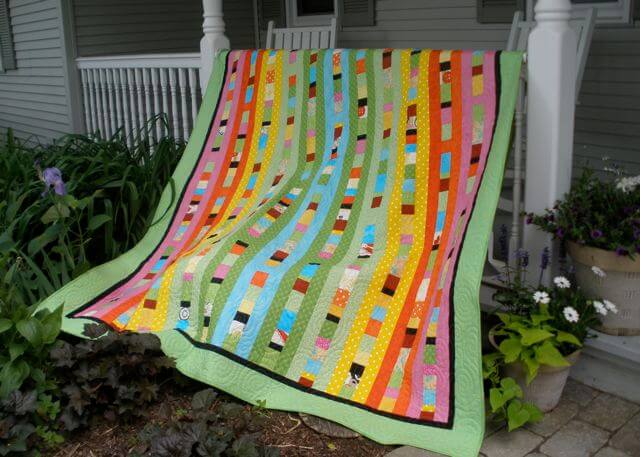
Quilt to Give: Step Two—Cut strips
It’s time for the second step of the Quilt to Give, a perfect quilt to give to someone in need.
Click here for a Quilt to Give Cutting Worksheet.
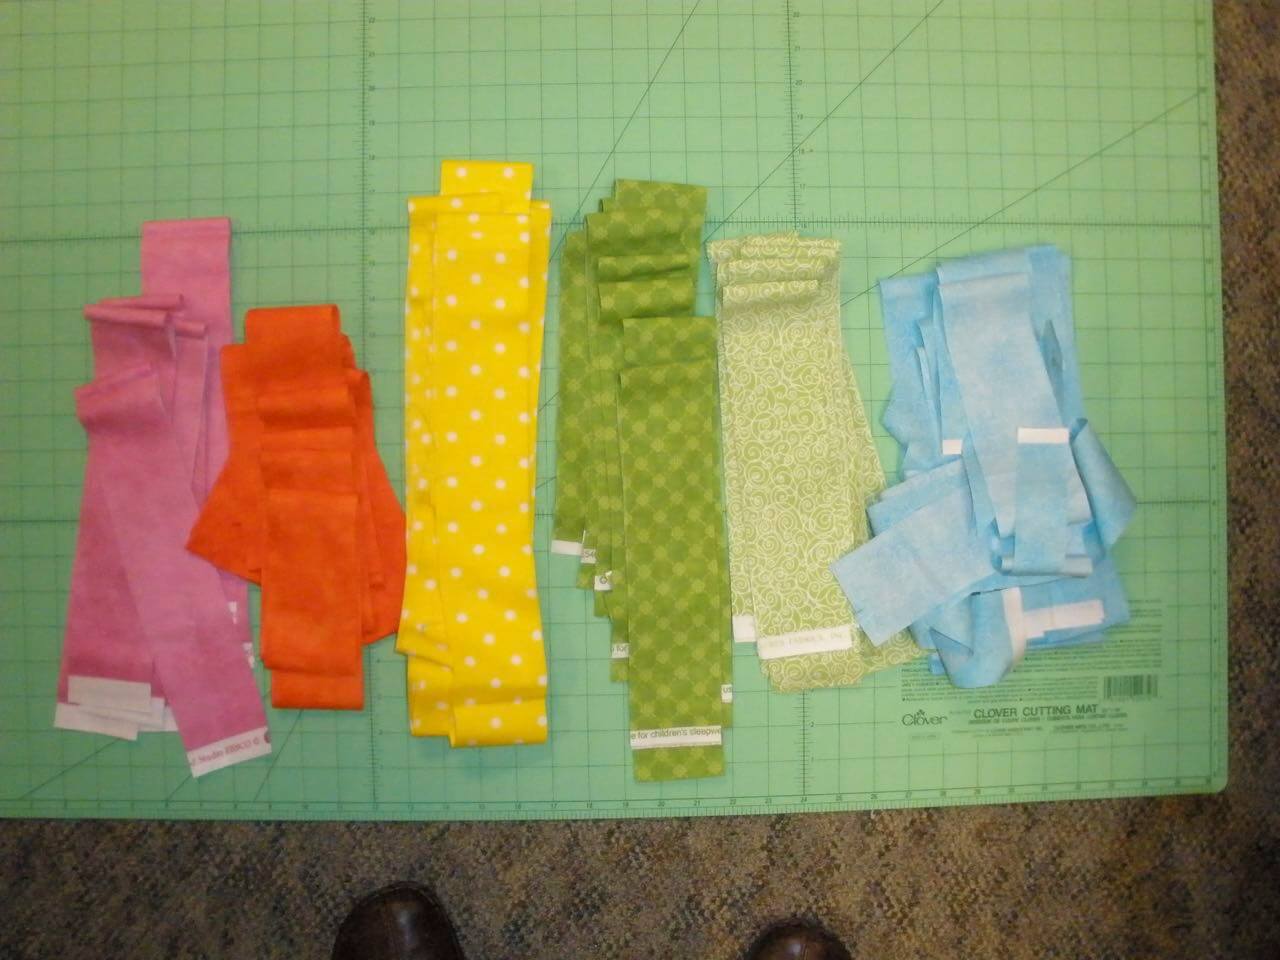
Outer Column Strips:
- Each column requires four, 2-1/2″ crosswise strips.
- Cut the fabrics selected for the column strips into 2-1/2″ crosswise strips. Use your rotary cutter, ruler, mat, and traditional strip cutting techniques.
- Double quilt: Cut eight strips from five colors and four strips from the 6th color. (The blue-colored fabric was only used for the center column.)
- Queen quilt: Cut eight strips from six colors and four strips from the 7th color.
- King quilt: Cut eight strips from seven colors and four strips from the 8th color.
Patchy strips

- Cut approximately 50–55 crosswise strips for a double size, 60–65 strips for a queen size, or 70–75 strips for a king size. Vary the width of the strips, ranging in widths from 1-1/2″—3-1/2″.
- Cut the dark colors the narrower widths for best design element. (Notice that the finished quilt has narrow black and deep red accents. Larger black or red sections would not have been as attractive.)
- Odd-shaped fabrics can be cut into strips and then pieced together to create a 42″ crosswise strip. Remember it’s patchy!


- The inspirational print will be cut into strips for the patchy center sections. The print will not be that evident in the finished quilt. Yet, it served a very important purpose of helping you coordinate color and fabrics!
- Consider organizing your strips in baskets. The mounds of strips may become overwhelming without a “home.”
All of your cut strips will eventually turn into the perfect quilt that will brighten someone’s day.

Step three is next. Here are the links to all the steps:
Step 1—Sort out fabrics from several stashes
Step 2—Cut column strips and center patchy strips
Step 4—Stitch the patchy center columns
Step 9—Layer and quilt your creation
Quilt for Others with “Quilt to Give” Learn how to set-up and organize a Quilt to Give Event.
The gift is in the giving!
Team Nancy Zieman
Nancy Zieman Productions. LLC.
![]()
Stitch it! Sisters is a production of NZ Productions LLC. Content in this feed is © copyright 2021 by Nancy Zieman Productions, LLC and may not be republished without written permission. You’re welcome to forward the email to a friend or colleague but it’s not okay to add the RSS feed automatically as content on a blog or other website. The FTC requires us to tell you that Nancy Zieman Productions, LLC has provided products by other companies in the course of doing business. The FTC requires us to advise you to take this information into consideration when reading this posting.

M L Miller
The column strips are cut 2-1/2″ wide. Are the scrappy center fabrics cut 2-1/2″ also? It just says to vary the widths (I think it means vary the lengths.) Thanks, MLM
Nancy Zieman
The scrappy center fabrics are crosswise cuts of fabric, varying in width: 1-1/2, 2″, 2-1/2″, 3″, etc. Hope that this helps!