

The Easiest Way to Appliqué a Monogram
A terrific way to add an artistic touch to a gift is with appliquéd monograms. Machine embroidery and appliqués team together in my new Carefree Appliqué Alphabet collection. There are three sizes of letters/monograms and numbers: 2″, 3-1/2″ and 5″ with geometric shapes that are ideal for monogram “frames.” Templates of each letter, number, and shape are included in the instructions, streamlining the appliquéing process.
For this project, I chose to embroider a letter A centered on a fabric circle for one of my darling granddaughters. Don’t worry; there will also be a personalized towel for her younger sister, too. Thankfully, my friends at Nancy’s Notions have towels in vibrant colors.

Supplies
- Amazing Designs® Carefree Appliqué Alphabet ADL-52
- Paper-backed fusible web
- Assortment of fabrics
- Assortment of Madeira Embroidery Thread
- Fingertip Towel
- Bobbins wound with all-purpose sewing thread
- Sticky-Back Tear-Away Stabilizer
- Optional: Mini Iron and pressing surface
- Optional: Wash-Away Stabilizer (I used this product to allow my stitches to sit on top of the terry cloth towel. Your project may vary.)

Instructions
- Trace the monogram or letter appliqué and a frame (circle in this instance) onto the paper side of paper-backed fusible web. Designs are mirror imaged so they will appear correctly on the completed project. All mirror-imaged appliqués are included in the instructions.

- Roughly cut out each image, allowing approximately ¼” around all edges.
- Fuse cut out appliqués to the wrong side of the fabric chosen for the appliqués. Cut out fabric letters, following traced lines.


- Remove paper backing from shapes, numbers, or letters.

- Use the directions in the Carefree Appliqué Alphabet to select the monogram, number, or frame design. Add it to the embroidery machine.
- Hoop the fabric. Or, depending on the project, hoop a sticky backed stabilizer, release the paper and stick the towel to the adhesive side of the stabilizer.

- Insert hoop into the computerized embroidery unit.
- Determine the placement of the embroidered appliqué on your project. Use your favorite method of positioning. I chose to use a placement sticker to align the project.

Easy Automatic Appliqué Technique
- Embroider the first thread color—the outline.
Note from Nancy: Use the same thread color for the first, second, and third thread colors.

- Position the wrong side of the appliqué fabric over the embroidered outline.

- Fuse the first cutout appliqué using a Mini Iron.

- Position Wash-Away Stabilizer over the appliqué to keep the stitches from sinking into the terry cloth pile.

- Embroider the second thread color—the tackdown stitch.

- Embroider the third thread color—the satin stitch.

- Remove Wash-Away Stabilizer.
- Change thread colors to match the next appliqué shape.
- Stitch thread color four to the outline monogram placement.


- Remove hoop from machine. (Do not remove fabric from the hoop.)
- Remove the paper backing from the fabric appliqué letters.
- Place the appliqué within the outline.
- Using the tip of an iron or a Mini Iron, fuse the appliqué to the fabric.

- Reinsert the hoop into the embroidery machine.
- Continue embroidering thread colors two and three.

- After the embroidery is complete, remove the stabilizer and fabric from the hoop.
- Carefully cut away excess stabilizer from behind the project.

Creative Options
- If you have embroidery editing software, or your embroidery machine can merge designs, consider merging the designs together before embroidering.
- Omit the fabric appliqué. Skip the step of cutting and fusing the fabric appliqué characters. Embroider directly onto your project. The base fabric is the feature fabric of the embroidery.
- Skip the satin stitching for a raw edge appliqué.
- Personalize the quilting design of your next quilted gift by skipping the satin-stitching and using the alphabet lettering for stress-free quilting with machine embroidery. More details on using an embroidery machine for quilting can be found here.
Using SVG Files
There are additional instructions in Carefree Appliqué Alphabet for using this fun design in conjunction with computer guided cutting systems. Cut exact lettering with ease using one of these systems.
So Many Options in One Package
- Three sizes of each letter/monogram: 2″, 3-1/2″ and 5″—both upper and lower case
- Three sizes of numbers 0–9
- Four different frame options in multiple sizes to coincide with the three sizes of letters/monograms and letters
- Ready-to-trace and cut mirror-image appliqués for easy monogramming
- User friendly instructions

Watch Machine Embroidery in Six Easy Lessons (Part One and Two) on Sewing With Nancy online.
To watch Sewing With Nancy on your iPad, iPod Touch, or iPhone, download the app.

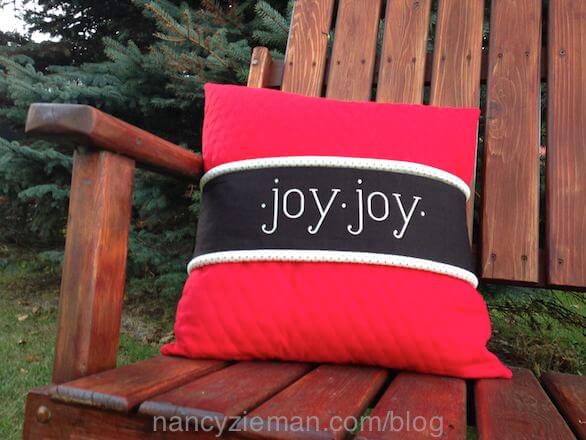
Don’t forget to submit your pillow project for the 2016 Pillow Sewing Challenge! The deadline to enter is March 20, 2016. Click here to see how to enter. Make sure you are subscribed to my enews mailing list so you won’t miss a thing. Sign up here.
Bye for now,
![]()

Cindy
love this machine embroidery lesson
Mickey Imhoff
Is this project one you do with an embroidery machine OR could I do it on my own machine, stain stitch, etc? I do lots on sating stitch appliqué and would like having this alphabet if it would work. Also, Would it be a good idea to “Hoop” when appliquéing with a regular sewing machine (satin stitch)
Thanks in advance.
Lorij
I want to know just as Mickey. All of my machines are just regular machines with 29 plus additional stitches. I do monograms with all of them using different types of interfacing and stablizers. They all torn out well. Most of the time I make my own designs and letters. These are nice.
Lorij
It should say:
They all turn out well
Carol Elmer
I love your lessons on the blog, but I want to save them to refresh my memory when I’m doing a project. How do you recommend I do that? I have tried pinning to pinterest but can’t find them again. There isn’t a printer friendly way to print them off. Suggestions?